Embrace the convenience of digital banking with our suite of iBanking online banking tools and our iMobile banking app
Level Up with Digital Banking from CorePlus
Experience the convenience of free remote banking from anywhere! Benefit from easily accessible insights and tools with just a tap, all while ensuring security and relying on trusted resources from CorePlus.

Free resources and digital banking tools to empower your financial well-being.
CorePlus Credit Union Online & Mobile Banking
It’s not just about convenience, it’s about connection. With CorePlus online and mobile banking, you’re not just a number. You’re a valued member of a community dedicated to your financial success. We offer personalized guidance, friendly support, and a genuine interest in seeing you thrive.
Embrace the digital banking revolution.
Unleash the Power of CorePlus Digital Banking
The CorePlus digital banking experience has been carefully designed to provide all the features and security you need to manage your finances from anywhere, anytime!
Digital Banking Highlights
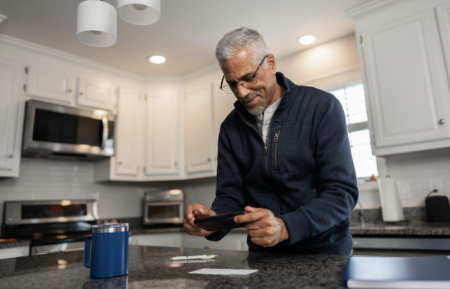
iMobile Banking with iMobile Check Deposit
Experience the convenience of iMobile Banking, including the seamless iMobile Check Deposit feature available to our Members through our online banking App. Download the CorePlus Credit Union App from the Apple App Store for Apple iOS® users or the Google Play® Store for Android® users. Your banking is now in the palm of your hand!
Self Service Center
Empower yourself with the Self Service Center. Update personal information, place a stop payment on a check, provide travel notifications for your ATM/Debit Card, and much more. Take control of your digital banking experience.
Real-Time Alerts
Stay in the know with Real-Time Alerts. Establish personalized notifications for key transactions, including low balance alerts, notice of direct deposits, insufficient funds charges, and even address change alerts. Your financial awareness, your way.
Customizable Views
Tailor your digital banking experience with Customizable Views. Whether you prefer transactions first or deposits first, customize your screen to match your preferences. Easily view statements, check balances, and navigate with ease.
Quick Links for Swift Actions
Access your most-needed features with Quick Links from any page. Make transfers, payments, access eStatements, or add a user seamlessly. Efficiency at your fingertips.
Enhanced Transfers
Manage your funds effortlessly with Enhanced Transfers. Transfer money within your account or seamlessly between banks. Choose between one-time transfers or set up automatic transfers over a specified period. Your financial control, your way.
Bill Pay for Effortless Management
Take charge of your monthly bills with Bill Pay. Manage when payments are made, track amounts owed, and set up payments to prevent late fees or overdrafts. Simplify your financial management with just a few clicks.
Secure Member Communications
Send secure messages directly to the Member Communications Center. Your communication is confidential, ensuring you get the assistance you need with peace of mind.
A2A: Account to Account
Use CorePlus iBanking to transfer money between your CorePlus Credit Union accounts and your accounts at other financial institutions.
To initially activate Account to Account (A2A), contact us to set up the transfer. We’ll ask you to bring a check or statement copy to your local CorePlus branch for verification. Future transfers can be done through CPCU iBanking, at your convenience!
At CorePlus Credit Union, we’ve crafted a digital banking experience with your convenience and control in mind. Your financial empowerment begins here!
Download our App: Apple App Store | Google Play Store
Get to Know iBanking – Digital Banking from CorePlus Credit Union
Explore the exciting features of our digital online banking system with this informative video! Learn how to effortlessly navigate, customize your screen preferences, access all or select accounts upon login, manage bill payments, initiate transfers, and much more.
Have questions or need assistance? We’re here for you!
Reach out to our dedicated iBanking and iMobile hotline at 860-886-0576. Our team is ready to provide exceptional service and support. Your seamless digital banking experience starts with us!
Digital Banking FAQs (Frequently Asked Questions)
Get Started with Mobile Banking
You are just moments away from being able to bank anywhere, anytime.
-
- Download the iMobile Banking App
Download our App: Apple App Store | Google Play Store
Online Banking members can download our App to a mobile phone or tablet, or access accounts via a mobile web browser
The CorePlus Credit Union App is available at the Apple App Store for Apple iOS® users and at the Google Play® Store for Android® users. - Complete the online banking enrollment by selecting “Enroll – Personal” for individuals or “Enroll – Business” for a business entity.
- Log into your CPCU online banking account.
- You’re Done!
- Download the iMobile Banking App
CorePlus Credit Union Members who are enrolled in Online Banking have automatic access to mobile banking web browsers. Just visit coreplus.org on your mobile device. Smart phone device users may visit the App store for the free downloadable apps for iPhone®/iPad® and Android™.
Our iMobile Banking App puts financial power in the palm of your hand. It’s Smart Banking, wherever you are!
-
- Access your accounts securely with biometric fingerprint or facial recognition authentication on your device
- Deposit checks anytime, anywhere with iMobile Check Deposit
- Check balances and recent transactions quickly and easily with Fast Balances
- Review up to one year of account history
- View images of paid checks
- Transfer funds between accounts
- Pay bills and manage payees
- Deactivate/reactivate your Mastercard® Debit/ATM card
- Send secure messages to our Member Communications Center
- Locate CorePlus Credit Union Locations and ATMs
- Download our App: Apple App Store | Google Play Store
Fingerprint Authentication provides an alternative method in addition to your User ID and password to safely and conveniently access your accounts through the CPCU iMobile Banking App.
Getting Started
-
- If you have at least one fingerprint registered on your supported mobile device, you can enroll in Fingerprint Authentication. For instructions on how to register your fingerprints, please refer to the documentation provided with your device.
- Open the CPCU iMobile App. Make sure you have downloaded the most up-to-date version of the CPCU iMobile App from the App (iOS) or Google Play (Android) store.
- Enter your User ID and password. If you are not already registered for online banking, you must register before using the iMobile app. Tap on “Personal Registration” and register for online banking.
- On the top right of the screen in the CPCU Mobile App, tap on the menu button (3 bars) then tap “Mobile Services.”
- Tap “Manage Fingerprint.”
- In this menu you can enroll your device or manage your saved devices. Tap “Fingerprint Enrollment” to set-up your device.
- When accessing Fingerprint Authentication for the first time, the “Fingerprint Authentication User Agreement” will appear. Please read the agreement carefully and select “I Agree” to enroll.
- Enter a unique “Device Name” and then your User ID and Password; tap “Enroll.”
- The next time you log into the CPCU iMobile App, you will be automatically prompted to authenticate using your fingerprint.
For more information contact our Member Communication Center at 860-886-0576.
e-Statements
Sign up for e-Statements today and start banking greener. View paperless statements each month and have less worry about:
-
- Mail Fraud
- Lost Mail
- Identity Theft
How to Enroll
Signing up is fast, safe, easy and FREE! Online Banking Members can simply:
-
- Log in to CPCU iBanking
- Go to the “eDocuments” tab at the top of the screen
- Select account, click “View eDocuments”
- Check receive notifications then click Next in the bottom right corner
- Accept terms of agreement
iMobile Check Deposit enables you to deposit checks anytime, and from anywhere. That’s Smart Banking!
Use a smartphone or tablet and the CPCU iMobile App to securely transmit a digital image of your check for deposit into your checking, share savings or money market accounts. iMobile Check Deposit saves you time by eliminating trips to the credit union or ATM.
Getting Started
-
- Open the CPCU iMobile App. Make sure you have downloaded the most up-to-date version of the app.
- Enter your Log In ID and password. If you are not already registered for online banking, you must register before using the mobile app. Tap on “Personal Registration” and register for online banking.
- The screen will open to a list of your accounts. On the top right of the screen, tap on the menu button (3 bars).
- Menu options will appear. To deposit a check, tap on the “Deposit Checks” menu option.
- When accessing iMobile Check Deposit for the first time, the iMobile Check Deposit User Agreement will appear. Please read the Agreement carefully and select “I Agree” to enroll.
- Once on the “Deposit Checks” screen, tap the drop down menu to select the account into which your check will be deposited.
- Enter the amount of the check.
- All payees must sign the back of the check. In addition, under the signatures (endorsement) you must write “CPCU Mobile Deposit Only”
- Place your check on a flat surface, preferably with a dark background.
- Select “Click Here to Take Picture” in order to take a picture of the front of your check. When first using this feature you will be asked to allow the application to access your camera. This feature cannot work without camera access. Hold your device above the check and align the check within the green frame. When the image is clear; tap on the screen to take the picture.
- Take a picture of the back of your check following the same process described above.
- Once you have clear images of both the front and back of your check, and have verified that all other information is correct, select “Make Deposit” at the bottom of the screen. Select “Cancel” if you wish to cancel this transaction.
- Once you have submitted your check deposit, a message that states “Your transmission was successful” with the information of your deposit will appear. You will also receive a confirmation email that your deposit has been received and subsequently you will receive an email regarding the final status of the deposit.
Please note: Destroy your original check fourteen (14) days after the deposit has been credited to your account.
If you have any questions, please contact our Member Communication Center at 860-886-0576.
Fast Balances gives you the answers you need, when you need them.
Use Fast Balances to view the available balance and recent transactions for checking, savings, money market and certificates of deposit as well as consumer loans and mortgages without entering a Log In ID or password. For security reasons, the account type and balances will be presented without names and account numbers.
Getting Started
-
- Open the CPCU iMobile App. Make sure you have downloaded the most up-to-date version of the app.
If you are not already registered for online banking, you must register before using the iMobile app. Tap on “Personal Registration” register for online banking. - At any time, tap or pull down the grey tab at the top of the log in screen. This will enable you to see a description of the Fast Balances functionality and directions for enabling Fast Balances. Tap on the grey tab or swipe upwards in order to return to the log in screen.
- Enter your Log In ID and password.
- The screen will open to a list of your accounts. On the top right of the screen, tap on the menu button (3 bars).
- Tap on the “Mobile Services” menu option.
- Tap on the “Manage Fast Balances” menu option.
- The Fast Balances User Agreement will appear. Please read the Agreement carefully and select “I Agree” to enroll.
- Once on the “Manage Fast Balances” screen, input a unique name for your device, such as “Susan’s iPhone” and select the account(s) you wish to view in Fast Balances.
- Tap on “Enable Fast Balances”. A message will appear at the top of your screen stating that “Fast Balances is currently enabled on the following devices”.
- Once you have enabled Fast Balances, you will need to log out in order to access Fast Balances for the first time. Select the menu bar option on the top right of your screen and tap “Log Out”. Logging out will bring you back to the log in screen.
- Open the CPCU iMobile App. Make sure you have downloaded the most up-to-date version of the app.
Using Fast Balances
-
- Open the CPCU iMobile App and tap on the grey tab at the top of the screen.
- The Fast Balances screen will display a message that the device is “Retrieving account information”. If this message does not appear, close out of the application and re-open it.
- Your available account balances will appear. Select the arrow to the right of the account information to view the last 5 transactions on each account.
To add or delete accounts, or disable or re-enable Fast Balances; select “Manage Fast Balances” in the iMobile app or… log in to the full site version of online banking and select “Banking Service Center” and under “Mobile Banking Services”, select “Manage Fast Balances”. In online banking, you can manage Fast Balances for all of your mobile devices from this one location.
If you have any questions, please contact our Member Communications Center at 860-886-0576.
e-Bills
Tired of receiving a paper bill for your loan each month? Sign up for e-Bills and just like e-Statements you will receive an email notification when your bill is ready to view online.
How to Enroll
Signing up is fast, safe, easy and FREE! Online Banking Members can simply:
-
- Log in to CPCU iBanking
- Go to the “eDocuments” tab at the top of the screen
- Select account, click “View eDocuments”
- Check receive notifications then click Next in the bottom right corner
- Accept terms of agreement
iBanking Bill Pay FAQs
1. What new features can I expect from iBanking Bill Pay?
iBanking Bill Pay offers new and improved features such as:
-
- More flexibility in scheduling options
- Enhanced eBills
- Payment scheduling options that interact with your eBills
- Rush payment options
- Later cutoff times
- The ability to group “like” biller/payees together
- Payments scheduled by a “Deliver By” date rather than mail date
- The ability to schedule payment reminders
- Payment monitoring
- Alerts and enhanced fraud monitoring to protect you from unauthorized payments.
2. Why am I receiving a message that says Bill Pay is not available?
If you receive an error message that says “Bill Pay is not available,” please check to make sure we have the most up to date home phone and/or email address on file. You may verify this information by accessing the “Service Center” tab within Online Banking. If after verifying your information, you continue to receive an error message, please contact our Member Communications Center for assistance at 860-886-0576.
3. What does “Deliver By” date mean?
The “Deliver By” date is the date the biller/payee will receive the payment. If the payment is sent electronically, this will also be the date that the funds will be withdrawn from your account. If the payment is sent by check, the funds will be withdrawn from your account when the bill is presented to the Bank for payment.
4. Why do I have to select a funding account?
The first time using our new iBanking Bill Pay, you will need to select an eligible account (typically checking) when processing a payment for each biller/payee. Once you have selected the account, it will be saved for that biller/payee.
5. Why do I have to re-enroll in eBills?
With our new iBanking Bill Pay, we have made some major improvements to our eBill process. By re-enrolling in our new and improved eBill system, you will have access to new features such as PDF copies of your bill, eBill alerts and new payment options that will allow you to schedule one time and recurring payments based on your eBill each month!
6. Why are some payments sent electronically, while others are sent by check?
The method of payment is determined by the biller/payee. Some biller/payees may also set certain dollar limits to what payments are sent electronically and what payments are sent by check. This means that your payment could be sent electronically, and other times, a payment to that same biller/payee could be sent via check.
7. How does iBanking Bill Pay make paying bills easy?
Rather than writing paper checks to the same biller/payee each and every month, you establish a biller/payee list. Then, each month it’s just a matter of pointing and clicking on a biller/payee, entering a date and amount that you would like to pay. You have the option of scheduling payments or setting up recurring payments, as well as having the control to make your payments when you want to.
8. How are my bills paid?
iBanking Bill Pay may prepare and mail a check for you or the payment may be sent electronically. The amounts are taken directly from your CorePlus Credit Union account. Simply enter the date you would like your payment to be received and iBanking Bill Pay will take care of getting it there on time.
9. What are the methods in which a bill payment may go out?
Payment methods may include, but may not be limited to, an electronic payment (ACH), an electronic check payment, or a laser draft payment (funds remitted to the biller/payee are deducted from your Payment Account when the laser draft is presented to CorePlus Credit Union for payment).
10. What happens if I don’t have enough money in my account?
If you do not have enough money in your account on the “Deliver By” date, the payment will still be sent to the biller/payee and you could receive an insufficient funds charge, as disclosed in our schedule of fees. We will try to collect payment a second time within 24-48 hours. If at that time you still do not have sufficient funds, a second insufficient funds charge may be assessed. At times, we may work with the biller/payee to try and reverse the payment. If the payment cannot be reversed, we will contact you directly to satisfy your outstanding balance. Your access to iBanking Bill Pay may also be restricted for payments resulting in insufficient funds.
11. How does the new iBanking Bill Pay system help to protect my account from fraudulent bill payments?
With our new and enhanced iBanking Bill Pay, every payment is evaluated to ensure that it is within your normal behavior, as well as within the normal behavior for that biller/payee. If we have any questions regarding any of your payments, the payment may be held for 48 hours while we try to contact you for verification. If we are unable to contact you, the payment may be cancelled.
12. How can I change the funding account I have set for a specific merchant?
To choose a different funding account for a specific biller/payee, simply select the new account from the “Pay From” drop down.
13. What if I need to change the funding account for my recurring payments?
Changing the default funding account for recurring payments is easy in our new iBanking Bill Pay. Simply select the “Accounts” tab and select the “Move Payments” link from the existing funding account. Select the new account from the “Move to this Account” drop down and click the “Move Payments” button.
14. Can I cancel a Scheduled Payment?
You may cancel or edit any Scheduled Payment (including recurring payments) by selecting the “Change” or “Cancel” links within the Pending Payments section of the Bill Pay system. There is no charge for canceling or editing a Scheduled Payment. Once the payment has begun processing, it cannot be cancelled or edited; therefore a stop payment request must be submitted.
15. Can I pay a person through the Online Banking Bill Payment system?
Yes, check payments can be sent to an individual from within the iBanking Bill Payment system. To send a check payment to an individual, click the “Add a Company or Person” button from within the Payment Center and select the “Person Tab.” You must be able to supply enough information on that person, such as name and full address for them to be created as a biller/payee.
16. How can I add a new biller/payee?
Click the “Add a Company or Person” button from within the Payment Center and select the “Company Tab.” You can either search for the company in the “Search” bar, or you can select the company from the list of major biller/payees. When adding a major biller/payee, the biller/payee information has already been identified by the Bill Pay system. Therefore, all you need to do is enter your account information for that major biller/payee.
For smaller businesses or local businesses, the biller/payee information may not be readily available; therefore, you may need to enter more information about the business such as mailing address and phone number.
17. How can I organize my list of billers/payees?
To organize your list of biller/payees, select the “Organize my List” link from the Payment Center. This will allow you to group biller/payees together in a way that works for you.
18. What are Bill Pay eBills?
eBills through Bill Pay is the presentment of your electronic bills directly within the Bill Pay system. It’s an electronic reminder that your bills are due.
19. What information is required to sign up to receive an eBill?
Often, only the biller/payee name and account number are required, although some do require an additional field for validation, such as ZIP or phone.
Ready to Start?

Kasasa Cash Checking
Earn Cash Back and Refunds on ATM Withdrawals with Kasasa Cash
Discover Kasasa Cash Checking
Kasasa Saver
Kasasa Saver is a free savings account that builds your savings effortlessly.
Kasasa Saver Benefits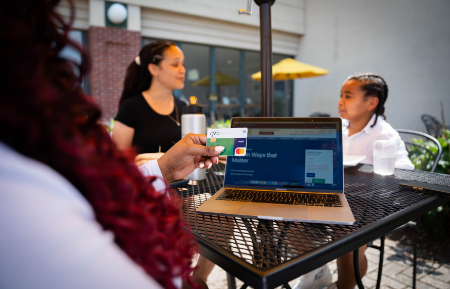
Credit Cards from CorePlus
Find the best credit card for your rewards goals. Competitive interest rates.
Credit Card Options